Leveling up the Aprimo and Tridion Integration - Part 1: Initial setup
Marko Milic
| Certified RWS Tridion architect and RWS Tridion MVP
|
While working for a client with their Tridion & Aprimo DAM environment, we were asked to help them with some new automation to streamline their processes for managing digital assets within Tridion using Aprimo DAM as the back-end repository.
Aprimo is a United States-based company that develops and sells marketing automation software and digital asset management (DAM) technology. Enterprise organizations' marketing and customer experience departments often use Aprimo to help manage the behind-the-scenes activities involved in marketing with large quantities of high-quality (e.g., resolution) digital assets (e.g., Videos, Images, etc.).
In recent years, Aprimo has added an official Tridion connector to their portfolio, enabling Tridion customers to browse, upload, and manage images, videos, and other media within Aprimo and easily use them within Tridion.
But this process is a multi-step manual process that requires accessing two systems – first, Aprimo to store the assets, and then Tridion to consume and use them within the content. This isn't ideal, so our goal was to simplify this and provide automation for the common tasks of uploading the asset into Aprimo and then referencing the asset (video) as an ECL item in a Tridion component. In the end, we wanted to provide a more seamless and streamlined experience for the users within Tridion.
For those of you who know me, you know that I am a passionate gamer. The thing about gaming is that it follows coding principles more closely than it would seem. For example, in gaming, you are presented with a set of challenges that you must first investigate and understand, then attempt enough times to master, and only after mastery can you advance to the next level.
The same process is commonly encountered when writing software. In my case, I knew how to create Tridion components via the Core Service API. However, Aprimo DAM and its API were completely unknown to me. Therefore, I had to experiment with it many times to acquire knowledge and learn techniques and strategies to pass the levels and finish the game successfully.
In this case, I had to pass 3 levels to win. They were:
Upload a video file to Aprimo DAM via their API
Create an Aprimo DAM record with the previously uploaded video
Reference Aprimo DAM record in a Tridion component as an ECL item.
In this series of blogs, I'll share tips and tricks that will help you to pass these levels. All of them I acquired primarily by simply experimenting with the API(s), trying different approaches, and learning from the process. But first, I had to do the initial setup before the game even began.
The Initial Setup
The official Aprimo DAM API documentation can be found here in this link. To begin the integration, you need an Aprimo account that will have sufficient permission to create, update, and delete records as well as to upload files.
After you have your account (with correct access), you need to acquire an API Token as follows:
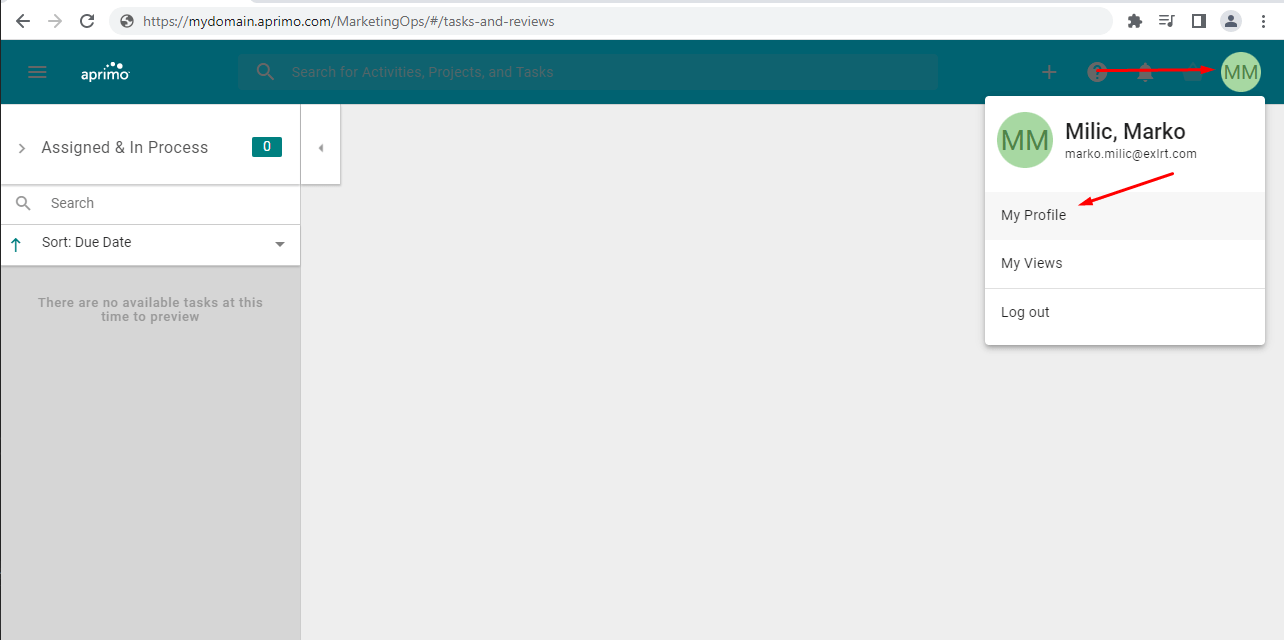
Go to the new UI in the Aprimo portal
Then click on your profile icon, select "My Profile"
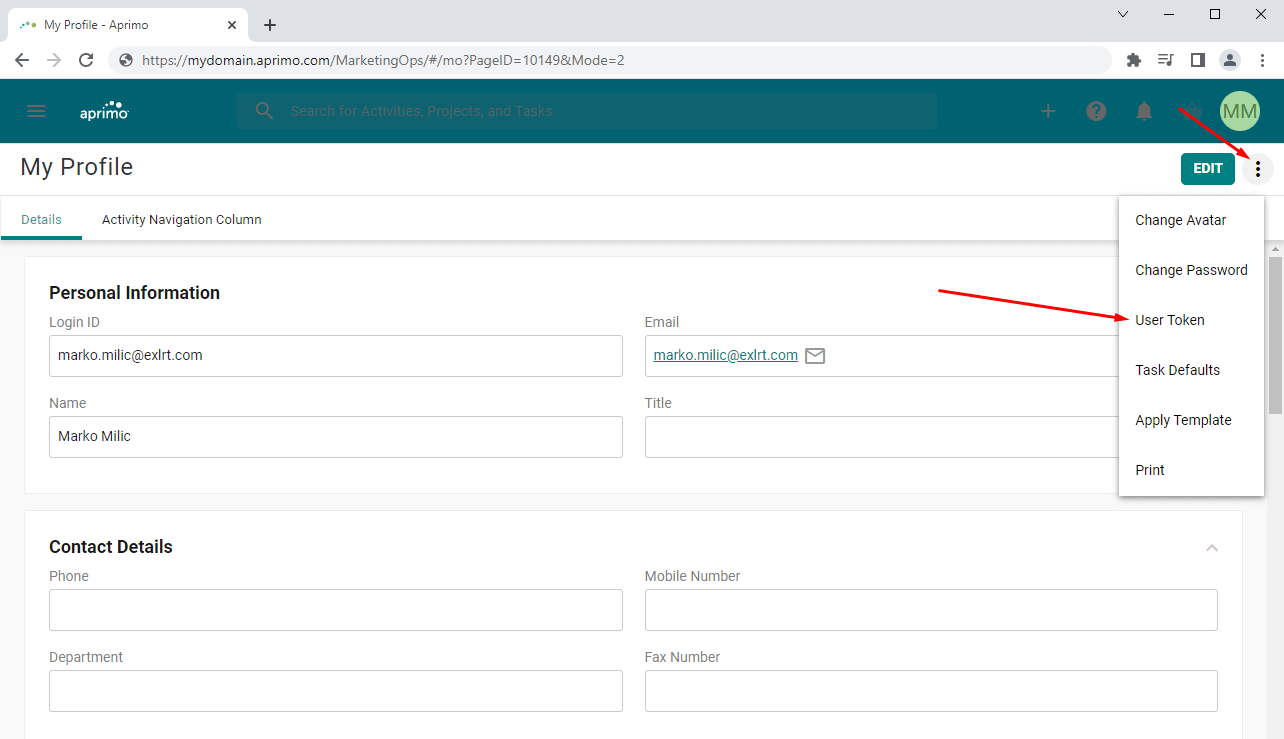
Click on 3 dots and select "User Token"
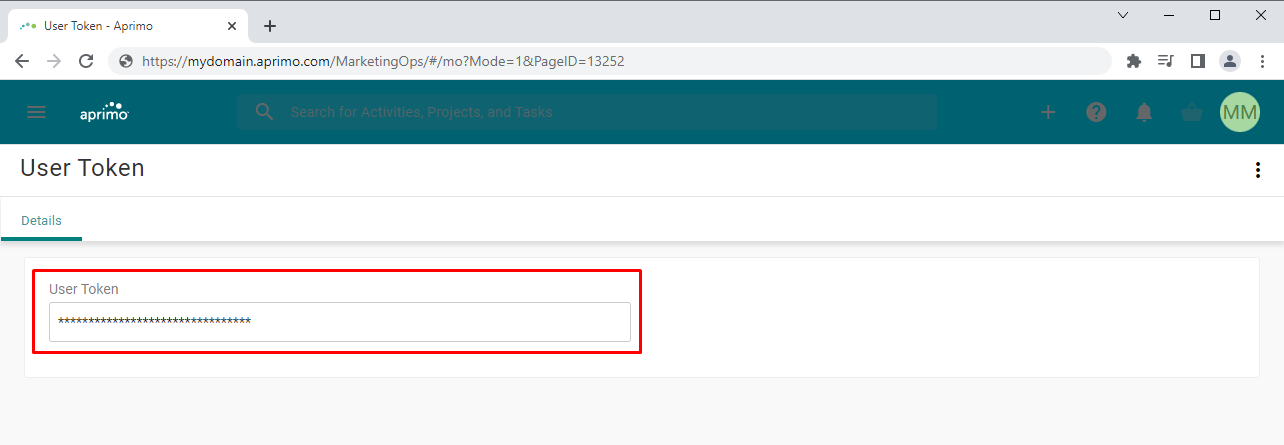
Here, you can generate a token that you can later use in the application
Go to "My Profile" in the new UI
Click on 3 dots and select "User Token"
Generate a user token to use later in the application.
After you obtain the token, you need to use it to connect to the Aprimo DAM API using token-based authentication. You can find more information here in this section of the documentation. However, to keep things short, after you create the access token above you will need to Base64 encode it. Here is a quick C# snippet to help get that done:
public class AprimoClientService() {
    protected string Username { get; }
    protected string Token { get; }
    private IHttpClientFactory _httpClientFactory = null;
    public AprimoClientService(string username, string token, IHttpClientFactory httpClientFactory)
	{
        Username = username ?? throw new ArgumentNullException(nameof(username));
        Token = token ?? throw new ArgumentNullException(nameof(token));
        _httpClientFactory = httpClientFactory ?? throw new ArgumentNullException(nameof(httpClientFactory));
    }
    public string GetAuthTokenForService() =>
    Convert.ToBase64String(Encoding.UTF8.GetBytes(Username + ":" + Token));
}
Now with a properly encoded access token, we need to acquire a valid login OAuthToken token. You can achieve this by executing a POST request to https://mydomain.aprimo.com/api/oauth/create-native-token, along with the encoding token as a Bearer Authorization header. Assuming you are using the raw HttpClient in C#, this is a sample snippet that will help you accomplish this step:
Now we can add an AuthenticateAsync() method to our AprimoClientService , which might look something like this:
//NOTE: By using the raw HttpClient we must make our code async safe by implementing the async/await
// pattern correctly. If you must call this within a synchronous context you may have to wrap
// it in Task.Run(), but be sure sure to read what Stephen Cleary says about doing this the right way:
//  https://blog.stephencleary.com/2013/10/taskrun-etiquette-and-proper-usage.html
public async Task<OAuthToken> AuthenticateAsync(CancellationToken cancellationToken = default)
{
	OAuthToken oauthToken = null;

	//NOTE: Always use HttpClient factory (do not Dispose of HttpClients)...
	var httpClient = _httpClientFactory.CreateClient();
	httpClient.DefaultRequestHeaders.Add("Client-Id", ClientId);
	httpClient.DefaultRequestHeaders.Add("Authorization", $"Basic {this.GetAuthTokenForService()}");

	//TODO: This should be configuration based in a real-world application...
	string requestUri = new Uri("https://mydomain.dam.aprimo.com/api/oauth/create-native-token");

	using (HttpContent httpContent = new StringContent(string.Empty))
	using (HttpResponseMessage responseMessage = await client.PostAsync(requestUri, httpContent, cancellationToken))
	{
		responseMessage.EnsureSuccessStatusCode();
		string responseContent = await responseMessage.Content.ReadAsStringAsync();
		oauthToken = ExtractOAuthToken(responseContent);
	}
	return oauthToken;
}
TIP:
Make sure that your account has the proper permission for uploading videos and images to Aprimo. It's often easiest to start with full admin-level permission and then decrease access gradually once you know your code is working correctly.
Now that we can connect and authenticate with the API (via the above sample code), we are able to interact with it and execute GET, POST and/or PUT commands.
In the upcoming blog (Part 2) I will guide you through uploading video files to Aprimo DAM via their API, simplifying the process step by step.
If you have any questions or if you are interested in getting firsthand experience from us about Tridion and Aprimo integration, feel free to contact us.