DXA 2.2 Series - Dissecting the R2 Data Model - Part 2
Atila Sos
| Certified RWS Tridion architect and RWS Tridion MVP
|
Just a quick recap of the previous entry. I started my previous post with a short history of R2, followed that by listing its advantages, and finally, finishing with an overview of the basic structure. I’ve used a simple example to illustrate the structure, and I will continue using the same approach once again. Each time I will add more complexity and highlight the differences in the output. That way, I can easily point out what is affected and how. Do note however that because I will be using different Pages, Schemas and other items, if you directly compare the outputs of various examples, you will see changes in the Titles, Ids and timestamps, but these are irrelevant. I will always highlight the important differences explicitly.
Example 1 – Empty Page with Metadata
This example has a slight variation over the basic (Example 0 from the previous blog). It still has no Component Presentations (CP) and no Includes, the only difference is that now I have added Metadata to the Page.
You can accomplish this in two ways. You can define a distinct Metadata Schema and use that on the Page, or you can define metadata directly on the Page Schema when using Native Regions. For completeness’ sake, I will show both below.
It’s important to point out that the end result is the same no matter which approach is used for adding the metadata, that is, the JSON structure is the same for both.
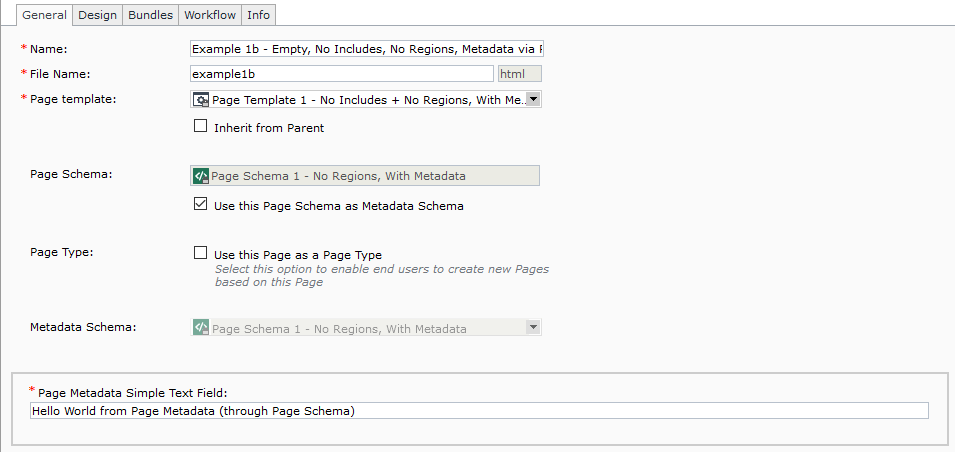
Example 1a – via Metadata Schema
Tridion items used – Example 1a – via Metadata Schema
Because the same Page Template and Page Schema are used as in the previous example, they are only listed below:
Page Template: Page Template 0 - No Includes + No Regions, No Metadata
Region Schema (used as Page Schema): Page Schema 0 - No Regions, No Metadata
Followed by the new items:
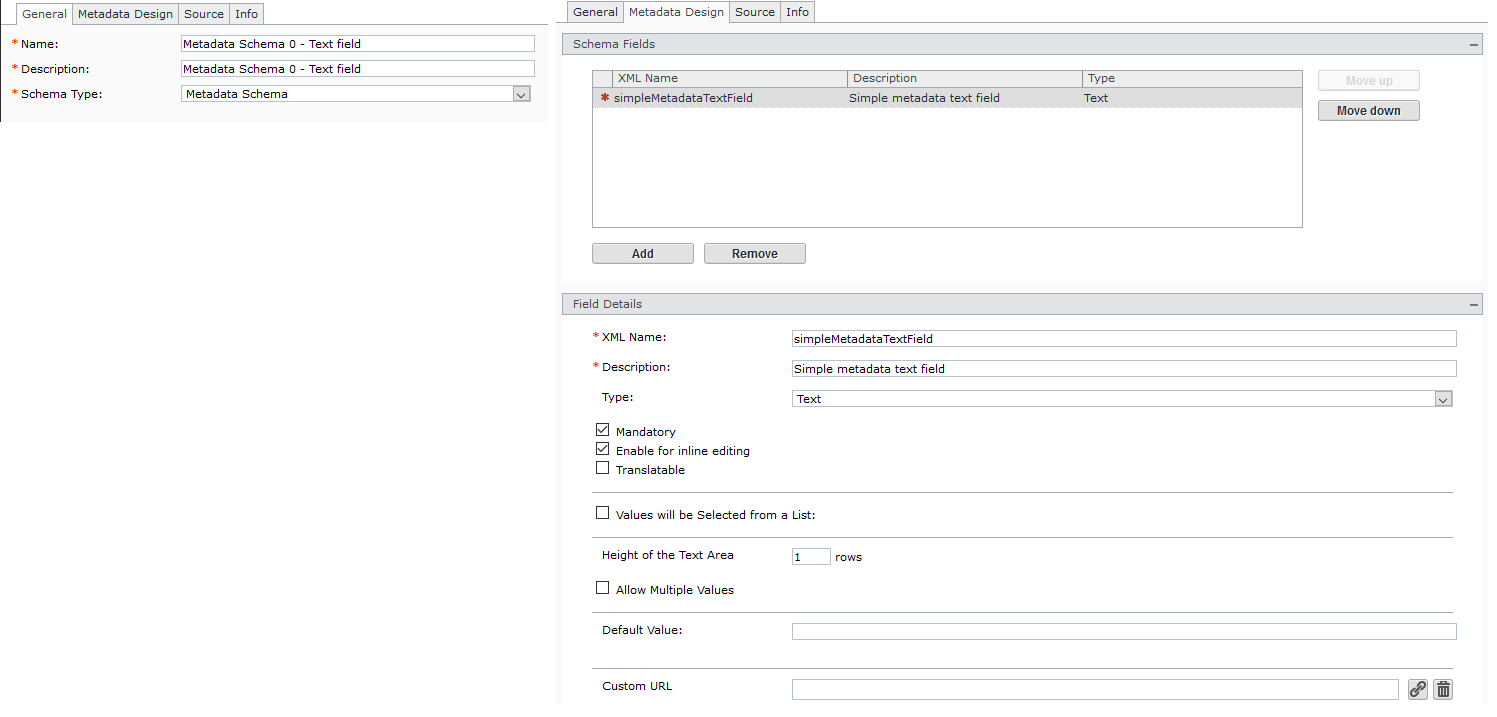
Metadata Schema: Metadata Schema 0 - Text field
Metadata Design: 1 text field
Example 1a – Metadata Schema
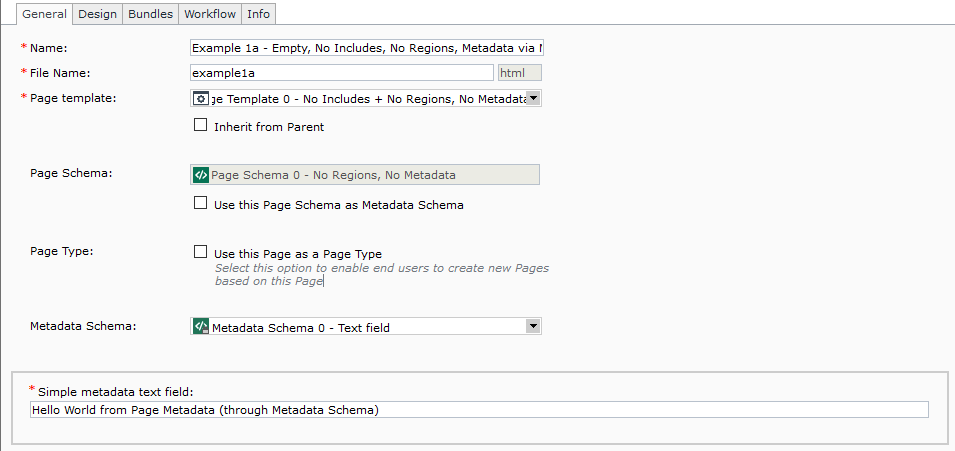
Page: Example 1a - Empty, No Includes, No Regions, Metadata via Metadata Schema
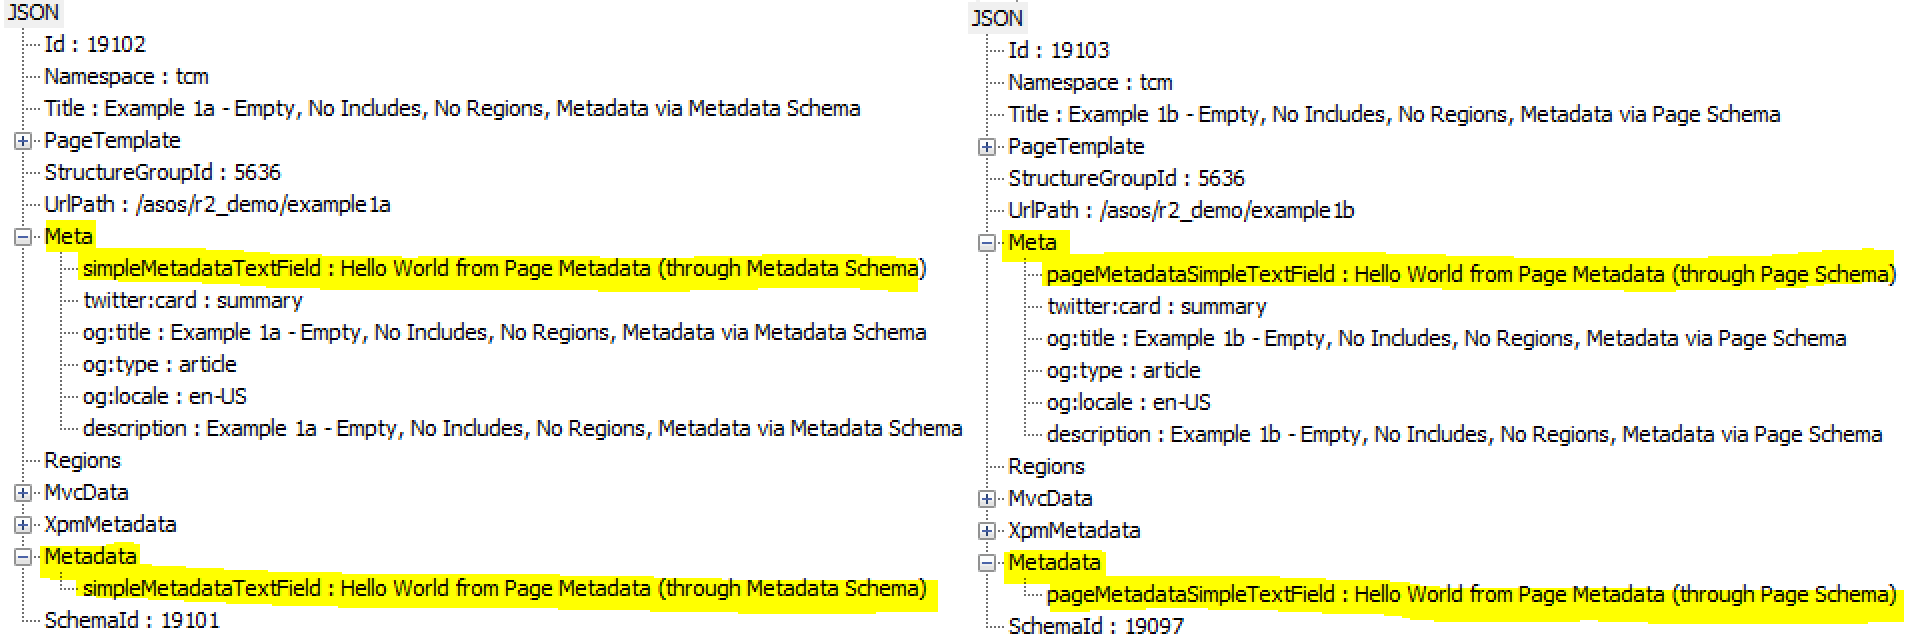
As mentioned earlier, the JSON structure is exactly the same no matter which approach was used for adding the metadata. The JSONs can be seen below:
Example 1 – Resulting JSONs
We can see that the Metadata has now appeared in both JSONs and in two places (this I explained in the previous blog). The JSON property consists of the xml name from the Schema (Metadata or Region) and its value is the entered value on the examples Pages.
One tip, don’t let the “SchemaId“ property just below the “Metadata“ fool you. It’s still the Id of the Page Schema and has nothing to do with the Metadata (it’s a sibling property and not a nested one).
Example 2 – Empty Page with Metadata and Includes
The next example is based off of Example 1b, the difference is that now we also add an Include through a new Page Template. Includes are a more complex topic on their own which I will cover later, but for now, let’s just see how the regular Page’s JSON changes if it has an Include referenced.
Tridion items used
As previously, I will provide a detailed view of new Tridion items used by the example, the rest I will only mention.
Existing item:
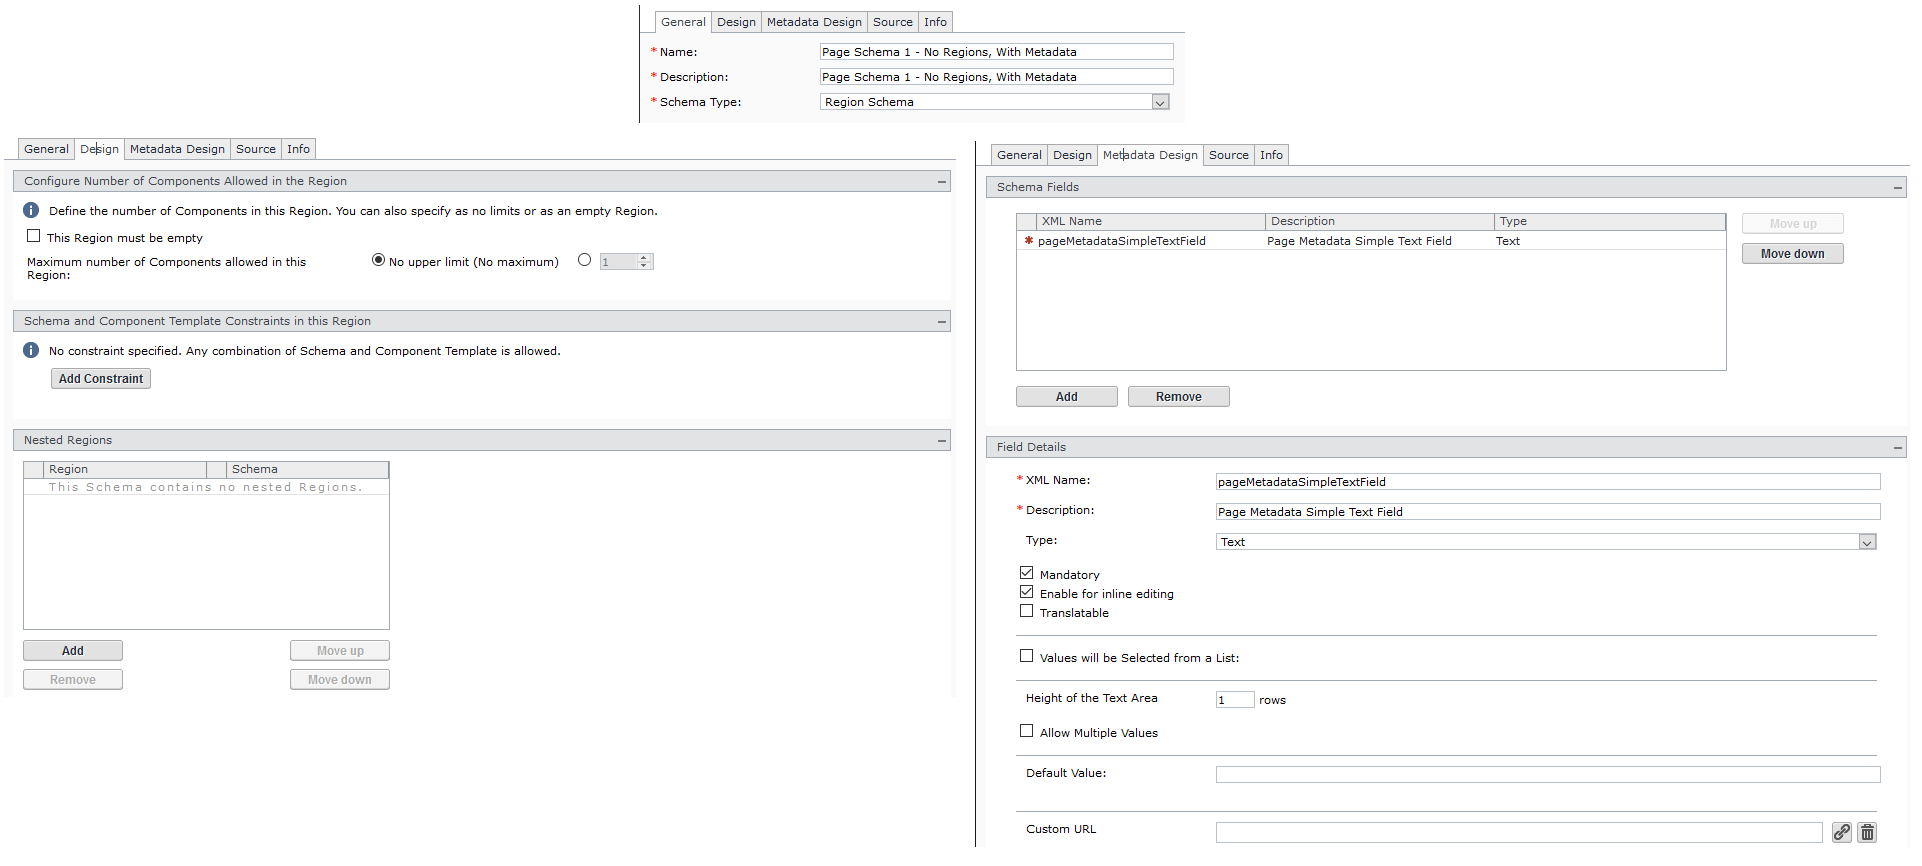
Region Schema (used as Page Schema): Page Schema 1 - No Regions, With Metadata
New items:
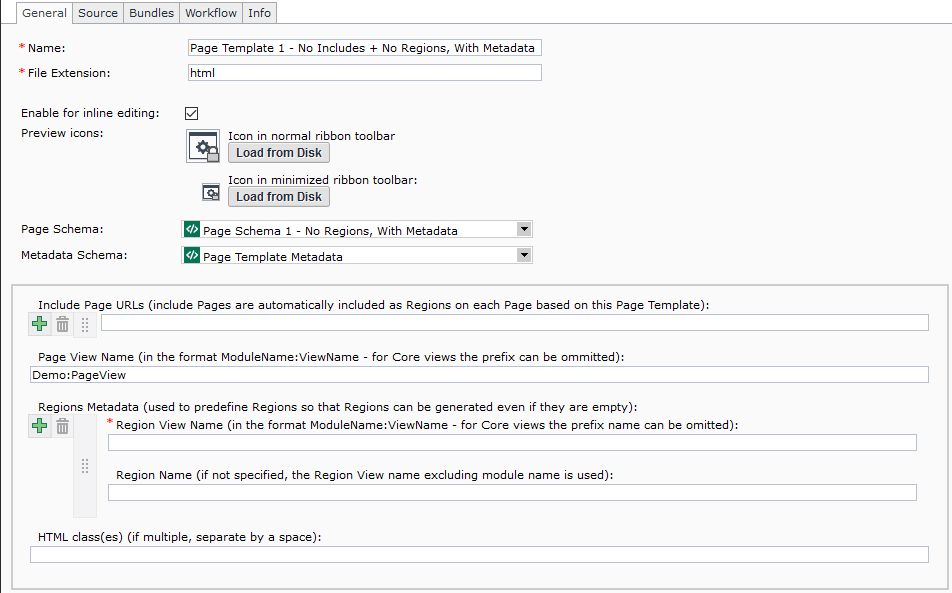
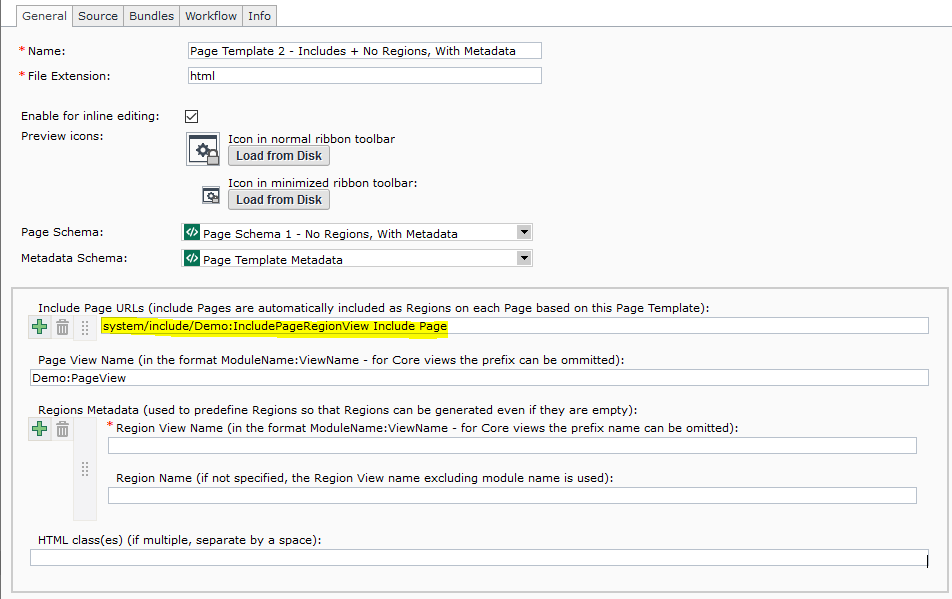
Page Template: Page Template 2 - Includes + No Regions, With Metadata
Page Schema: Page Schema 1 - No Regions, With Metadata
Metadata:
Includes: system/include/Demo:IncludePageRegionView Include Page
Page View Name: Demo:PageView
Example 2 – Page Template
Page: Example 2 - Empty, With Includes, No Regions, Metadata via Page Schema
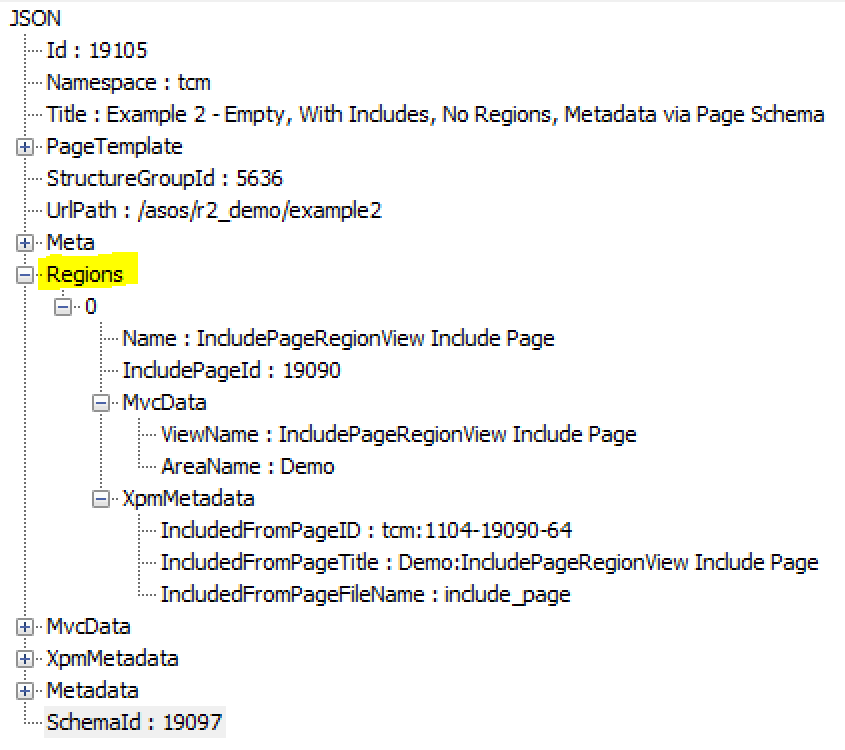
By looking at the resulting JSON, we can see that adding an Include to the Page via the Page Template results in the “Regions” now containing a member. And basically, that’s what Include Pages do. They are “transformed” into Regions and are available to all Pages whose PTs reference any. A Page can even have more than one Include Pages, or it can have none (like in the previous examples).
I haven’t shown what the Include Page looks like itself because that’s not the point of the example, but once I get to the Include Pages examples, I will go through all the details.
For now, these are the things which we can observe, and which should be the takeaway:
The Include Page is referenced on the PT level through its WebDAV (excluding the extension). You can reference it in an alternative way, but the WebDAV is the preferred one.
The referenced Include Page must exist, otherwise publishing the content Page is not possible. It will throw an error
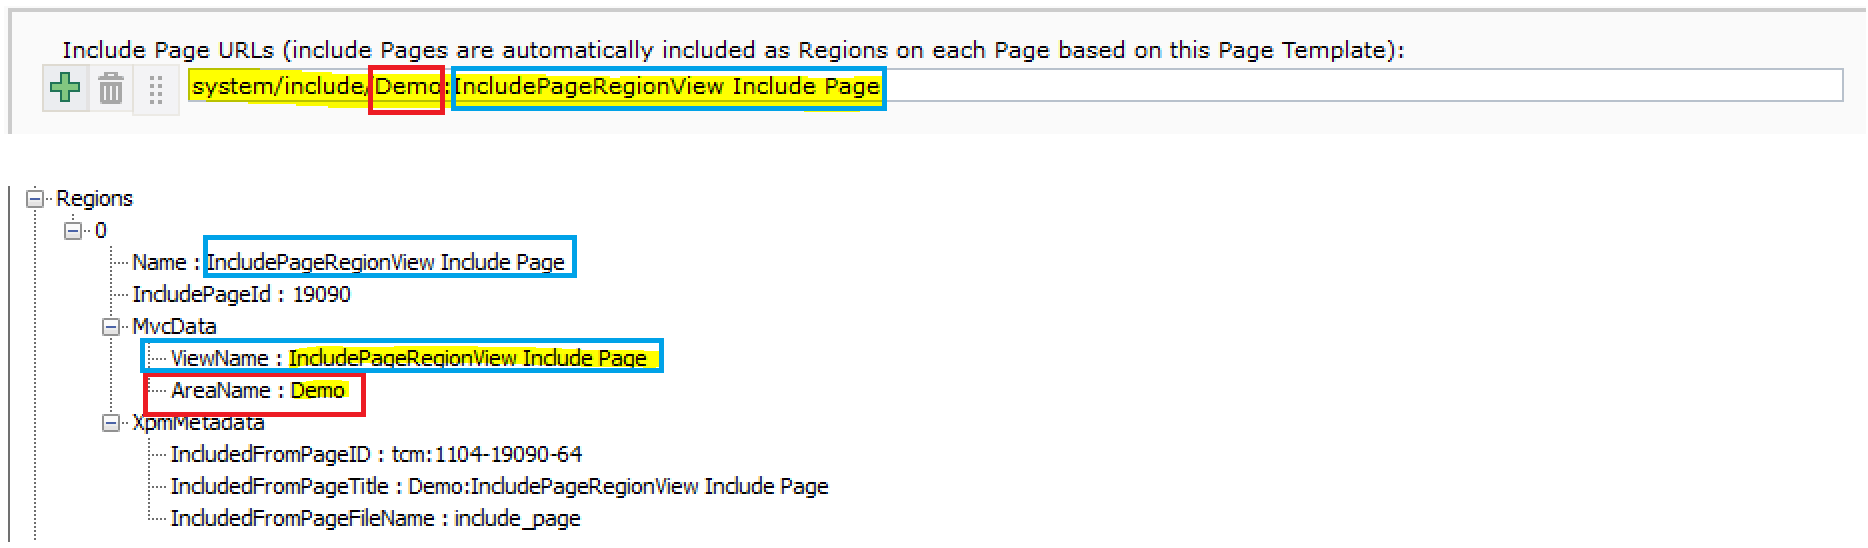
The Title of the Include Page directly influences the “MvcData” (as illustrated below), which in turn drives the internal routing of DXA. In the previous blog I mentioned that the MvcData is controlled by the Template’s (Component/Page) Metadata and that there are exceptions to this. This is one of them. Here, a Title of a Page defines the MvcData instead of Template Metadata.
When the “MvcData” of the resulting Region is being populated (as part of rendering when publishing or previewing), the same convention is used as with the Template based MvcData definition (in the format ModuleName:ViewName and ModuleName:ControllerName):
If the Title contains “:”, then the left side is the Area, and the right side is the View
If the Title does not contain “:”, the Area is taken from the “default-module” setting in the web.config
The Title of the Include Page (or if the Title contains “:”, then the right part of the Title) also defines the “Name” of the Region
Example 2 – JSON fragment Regions and its relation with Include section from Page Template
A quick walkthrough of the “Regions” property. It’s an array which in this case contains 1 member (with index 0).
The Region under index 0 has the following properties:
Name – The name by which this Region will be available in the Page Model. The name is used by the built-in HTML helpers. (ie. Html.DxaRegion())
IncludePageId – The Id of the Include Page. This is used by the Model Service (extension) when building the Page Model Data for the requested Page. If you are unfamiliar with this process, I will also describe it in one of the upcoming blocks
MvcData – Same as in the previously seen examples. Servers the same purpose, but here its properties are defined in a different way (explained in the list above)
XpmMetadata – Serves the same purpose as the XpmMetadata from the previously seen examples, but with different properties. For “regular” Regions, these properties are different than the ones we’re seeing here
Just a note that the listed properties apply if the Region is the result of an Include Page. If the Region directly belongs to the Page, than the properties are a bit different.
Conclusion
In this entry, I have started expanding the R2 Data Model and have touched upon a more complex topic of Include Pages. In the next entry, I will continue expanding on the Model whilst explaining any specifics that are involved.
As always, if you have any questions, please don’t hesitate to get in touch.
This website uses cookies to provide a better user experience, personalization of content and ads, as well as the integration of social media and analysis of traffic on the internet. By clicking on 'Accept', you consent to the placing of these cookies.