Deploying SI4T storage extension using Add-on service
Marko Milic
| Certified RWS Tridion architect and RWS Tridion MVP
|
If you read this blog, then you are probably already familiar with Tridion’s “Add-on Service”. If not, you can get familiar with it by checking out this blog by Atila Sos.
In general, the Add-on Service is used to simplify the deployment of extensions and their configurations. Which brings us to our topic: How to package and deploy the SI4T storage extensions? In this article, we will dive into extending Tridion by integrating SI4T with the Elasticsearch engine.
As you are probably aware, SI4T or Search Integration for Tridion is an open-source project that helps you get RWS Tridion CMS-managed content into your web app search index. It was primarily developed to allow you to push your content into Solr. But, in the latest versions, it has been enhanced to now support pushing content into Elasticsearch by Velmurugan Arjunan. You can read this blog of his where he explains it in detail.
Most of the existing tutorials online explain how to deploy the SI4T deployer extensions manually. However, since the Add-on Service was introduced, automatic deployment became the preferred way due to the obvious benefits it provides. Therefore, this blog will explain how to package the SI4T deployer storage extension into an Add-on Service package and properly deploy it.
Step 1: Download and Get Familiar with SI4T
As noted above, SI4T is an open-source project that provides a Framework for search integration with Tridion and can be downloaded from their site or the repo.
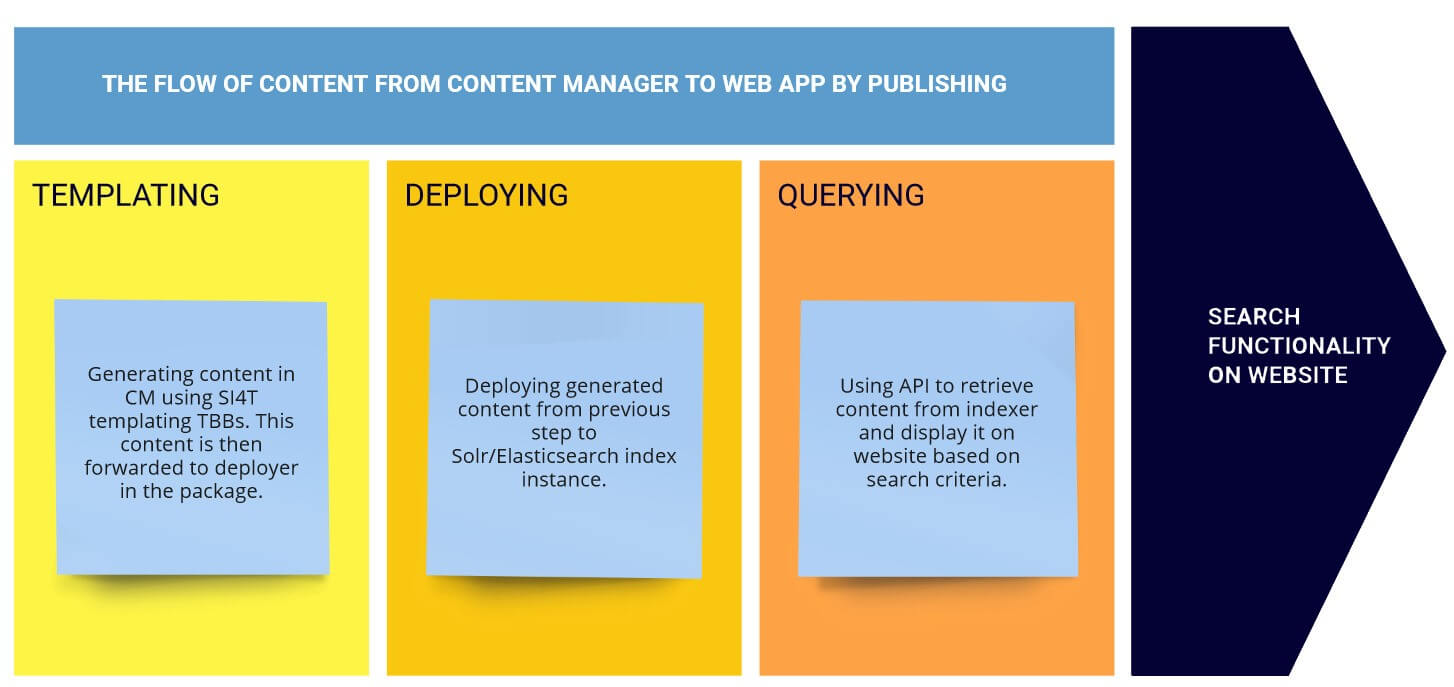
There are many benefits of using SI4T to provide a framework for integrating search functionality in your Tridion implementation. The integration is trifold:
Firstly, it extends your templating with SI4T TBBs, which generate search content during the rendering phase in the templating process.
Secondly, a storage extension is configured in the Tridion Deployer to provide the ability to deploy content from the content manager (CM) templating process into the search indexer such as Solr or Elasticsearch.
Thirdly, it provides capabilities to query your content from your web application via an API.
Step 2: Configure Templating
This is explained in detail in the SI4T documentation here and consists primarily of the deployment of SI4T Template Building Blocks into Tridion’s templating process. It is a prerequisite for setting up the deployer since it provides the rendered search content needed.
Step 3: Download Deployed Deployer add-on Package
What a mouthful subtitle 😊.
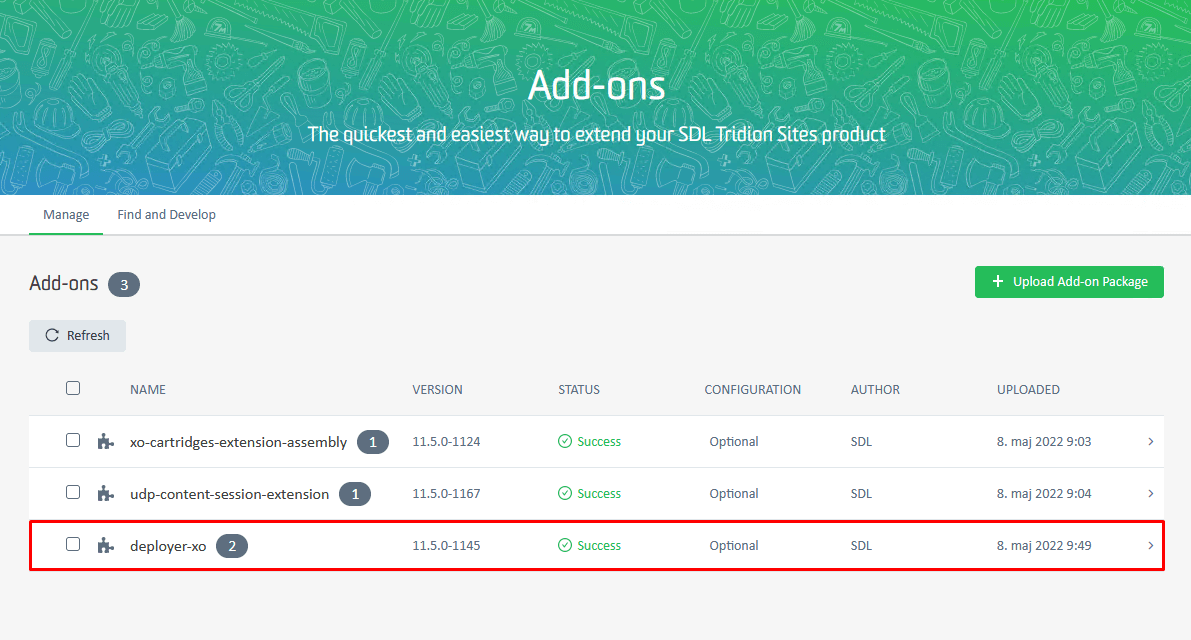
During the installation you have probably deployed one of the following extensions:
You can check which one you have by going to the Content Manager Explorer and selecting Add-ons from the slide-out navigation and from the Manager tab. In the Add-on manager, you can see a deployer package called deployer-xo or deployer-xo-cx (that has two extensions). It is the default one you need to download with configuration (if existing). We will customize this extension and redeploy, so at this step, after download, you may uninstall it.
In usual case scenarios, the default extensions should not be customized. Plus, if you have multiple extensions of the same type (like GUI extensions), you can deploy them separately, and they will function fine. However, deployer extensions are specific/unique, meaning that it requires the default one to be modified, as opposed to creating a new one. Hence, if you were to create a new one, for example, a sitemap deployer extension, and deploy it using the Add-on manager then both the default one and your custom one will fail.
Even though SI4T is a storage extension, and will not cause conflicts with the deployer extension, my preference, in this case, is to modify the existing one, keeping all the changes related to the deployer in a single add-on package. This is why we are extending it with SI4T and not just creating a new Add-on package.
The downloaded .zip file and .json configuration files will be our starting point for modification.
Step 4: Download SI4T Storage Extension Code and Build it
Storage extension code is already customized for Elasticsearch and is available for download here. All that is required in this step is that you download the source code from the location and build it.
Once you complete the build, you will be left with a .jar file, which you can name si4t-elastic-1.0.jar, along with all the dependencies like si4t-se-1.2.jar (for Tridion 9.1 and earlier versions) or si4t-se-1.4.jar (for Tridion 9.5), lucene*.jar and elastic*.jar in the build folder. You will find these as well as the previously downloaded .zip file in the next step.
Step 5: Customize the default deployer add-on package
In my case, the deployer add-on zip file is called xo-deployer-extension-assembly.zip (version 11.5.1145). Rename it to xo-deployer-extension-assembly-11.5.0-1145-EXLRT-0.1.zip
EXLRT0.1 is a custom version that differentiates the default extension from the custom one. For every modification, you can increase it to EXLRT0.2, EXLRT0.3, etc. You may use whichever versioning convention you like.
Next, copy the built SI4T jar files from the previous step into the zip file.
Step 6: Creating SI4T Deployer Configuration
The Add-on Service allows you to deploy associated configuration per each package deployed. Therefore we create the xo-deployer-extension-assembly.json file (which also be versioned) with the following JSON configuration content:
Step 7: Creating and Updating Configuration Files in Deployer Extension
Download SearchDAOBundle.xml from this link and copy it into the xo-deployer-extension-assembly-11.5.0-1145-EXLRT-0.1.zip. You can download it from this link.
Create and copy a version of cd_storage_conf.xml called cd_storage_si4t_storage_conf.xml and copy it into xo-deployer-extension-assembly-11.5.0-1145-EXLRT-0.1.zip
The important thing here is the <Indexer …> node now contains the configuration mapping values defined in the previous step, meaning that the "searchdocendpoint" property in xo-deployer-extension-assembly.json configuration is mapped to "${searchdocendpoint}" placeholder, etc.
in the same configuration states that JPASearchDAOFactory class is the entry point class for the storage extension. If you have some free time, it may be useful to deep dive into the SI4T project and check it out.
Step 8: Customize the Existing manifest.json File
Every package deployed by Add-on Service requires a manifest.json file.
Since I am modifying the existing package, I will update it to include the configurations related to the SI4T.
Please make that, in the manifest.json file, I have modified the version, logo, and author because this information is displayed in the Add-on manager UI, helping to show that this is a modified version of the default Add-on package.
In “extensions” section add new CDMergeableConfigurationExtension extension as follows:
The configuration from the above states that my custom cd_storage_si4t_storage_conf.xml config should be merged in cd_storage_conf.xml; the merge is done dynamically in memory. Because of this, even if you go to the deployer and open the cd_storage_conf.xml file you will not see the changes there. However, they are indeed retrieved and deployed.
Final step: Deploy Add-on Package
Finally, we are ready to deploy our package -- this is where the beauty of the package deployment shows value.
So upload the package to the Add-on Service in the UI. Also upload the configuration we created (xo-deployer-extension-assembly.json).
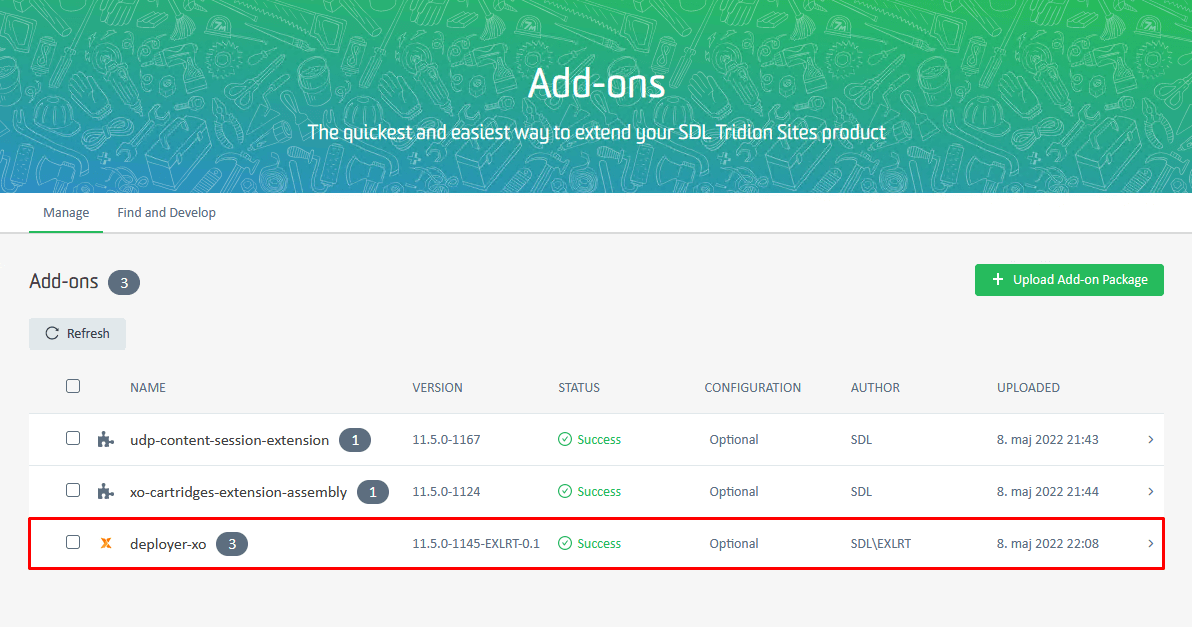
After this, you will see that the deployer-xo Add-on is displayed as a new version, new icon, and has three extensions (see the bubble); as opposed to the previous two shown, where one new item was added for SI4T.
After this, all you need to do is check if the indexes are being populated in your indexer instance with a new republish of your components, and you are ready to start using it in the web application.
If you have any questions, feel free to contact us.